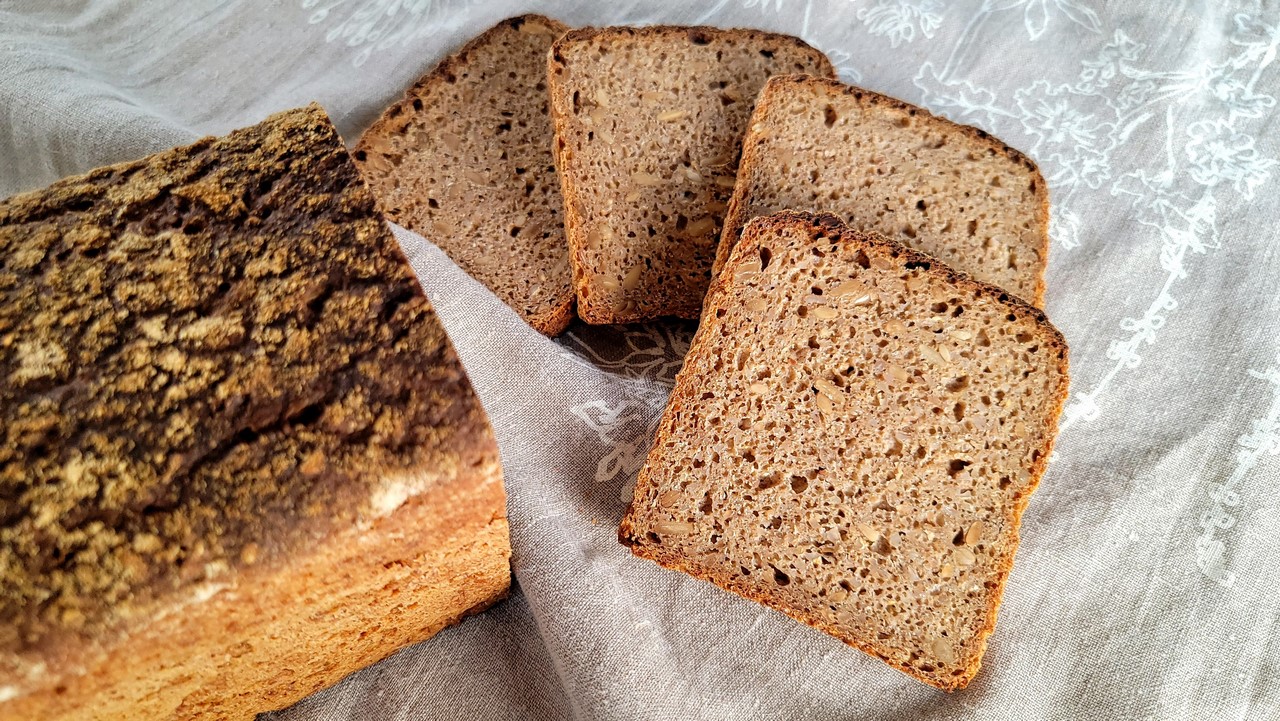
German Vollkornbrot with Rye and Spelt
This recipe for German Vollkornbrot (aka whole grain bread) uses both rye and spelt flours, a cracked rye soaker, and sunflower seeds to make a nutrient dense bread that’s earthy, nutty, and fruity-sour. The slices are wonderfully textured and delicious eaten plain, slathered in butter, or paired with a thin slice of a cheese such as monterey jack, havarti, gouda, or cheddar. The bread’s flavor evolves over time and it can be stored well-wrapped in the refrigerator for as long as a month.
Vollkornbrot is made with at least 90% whole grain rye and/or wheat flours at any ratio. The German Food Code guidelines (Deutsches Lebensmittelbuch) for this category of bread recommend that two-thirds of the acid in the bread comes from sourdough, so recipes for Vollkornbrot often have a sourdough pre-ferment or sponge. Cracked grains (aka “chops”) and flaked grains, as well as various seeds like sunflower, pumpkin, and flax are also often featured in recipes for this bread.

Clockwise from top left: cracked rye soaker, spelt flour, extra water (not needed in the end), sunflower seeds, salt, mature rye sponge
While this recipe calls for specific flours, grains, and seeds; you can substitute based on your inventory and preference. The cracked rye soaker has an amazing sweet-grassy aroma the next morning that was delicious in the final bread. This inspired plans for trying other cracked grain soakers, such as einkorn and buckwheat. Likewise, because the dough is more of a batter and the baking is supported in a pan, changing the flours and having some variation in the hydration is not a problem. Simply make sure you bake the bread to an internal temperature over 208°F if you use more than 50% rye flour, and over 205°F if you use less (or no) rye flour in the dough.
This recipe uses a small Pullman pan (9x4x4 inches). If you want to use a large Pullman pan (13x4x4 inches), multiply the ingredients by 1.44 and this FAQ explains how to scale recipes to any pan you choose.
Don’t forget to check out the Photo Gallery after the recipe to see steps in the process and the target dough expansion.
German Vollkornbrot with Rye and Spelt
Vollkornbrot is a German whole grain bread with complex fermentation flavors and plenty of nutrients and texture. This version has spelt and rye flours, a cracked rye soaker, and sunflower seeds, which all combine to give the bread a tasty fruity-and-nutty flavor that pairs well with cheese and butter.
Ingredients
Soaker
- 225 grams cracked rye berries (1 3/4 cups)
- 315 grams water (1 1/3 cups)
Sponge
- 320 grams rye whole grain flour (2 1/2 cups)
- 320 grams water (1 1/3 cups)
- 20 grams sourdough starter (1 Tbsp)
Final Dough
- All of the Soaker
- All of the Sponge
- 170 grams spelt whole grain flour (1 1/3 cups)
- 14 grams salt (2 1/2 tsp)
- 75 grams sunflower seeds, unsalted (2/3 cup)
Instructions
Soaker (night before)
- With your mill stones set relatively wide, about 20 ticks from “stones lightly knocking” position, crack the 225 grams of rye berries. There will be some flour-powder among the rye pieces, which is fine. If you don’t have a grain mill, you can use a spice/coffee grinder to chop the rye berries.
- Combine the cracked rye with the 315 grams water, cover and let sit overnight.
Sponge (night before)
- Mix the sponge ingredients in a bowl or straightwalled container, cover and let ripen overnight. This is essentially a very large rye levain or pre-ferment.
Final Dough (in the morning)
- Mix the dough ingredients (including the soaker and the sponge) in a large bowl. A Danish dough whisk is a helpful tool for doing this. You shouldn’t need any additional water for the dough unless with thorough mixing you still have dry flour.
- Butter a small Pullman pan and transfer the dough to the pan. Smooth the top of the dough with a spatula or damp fingertips. Sprinkle the top of the dough with flour or additional seeds.
- Cover and let the dough rise until it almost reaches the top of the pan in the center and is about 1 cm from the top on the edges. This could be 1.5-3 hours depending on the ambient temperature.
Baking (late morning)
- Before the final proof is complete, begin preheating the oven to 450°F.
- For easy steam creation, cover the Pullman pan with its lid or a foil tent.
- Place the pan in the oven on a mid-low shelf and bake as follows:
- 450°F for 15 minutes, covered
- 425°F for 45 minutes, uncovered
- 425°F for 5-10 minutes, out of the pan directly on the rack
- Let the bread cool and set for at least 24 hours before slicing. Once cool, you can leave it covered at room temperature for several days. After that it will begin to harden but still be tasty. Or you can wrap it in plastic or beeswax wrap and refrigerate it for about a month.
Photo Gallery
- Cracked rye grain
- Water soaker
- The next morning
- Close-up of the ripe sponge
- Ready to mix
- Batter consistency
- Immediately after mixing
- Dusted with flour
- About 90 minutes later
- Almost to the rim
- Forming a foil cover-tent
- Just fits the pan


